|
|
| (18 intermediate revisions by 3 users not shown) |
| Line 1: |
Line 1: |
| ==WalkThrough==
| | __NOTOC__ |
| ===Level 1===
| |
| Encounter Zone
| |
| * Min Level: 0
| |
| * Max Level: 20
| |
| Summary: This is the easiest level. Even a lvl 1 character should be able to defeat all the enemies.
| |
| ====Stage 1====
| |
| *Enemies to Kill: 6 Rabbit Goats
| |
| NOTE: The Easter Bunny is located in this room. Take the small passage near the ramp to find him. Ask him where is eggs are and offer to find them
| |
|
| |
|
| ====Stage 2====
| | {{LinkPath|{{#explode:{{PAGENAME}}|/|0}}|{{#explode:{{PAGENAME}}|/|1}}|{{#explode:{{PAGENAME}}|/|2}}}} |
| *Enemies to Kill: 21 Draugr
| | ==Overview== |
| ====Stage 3====
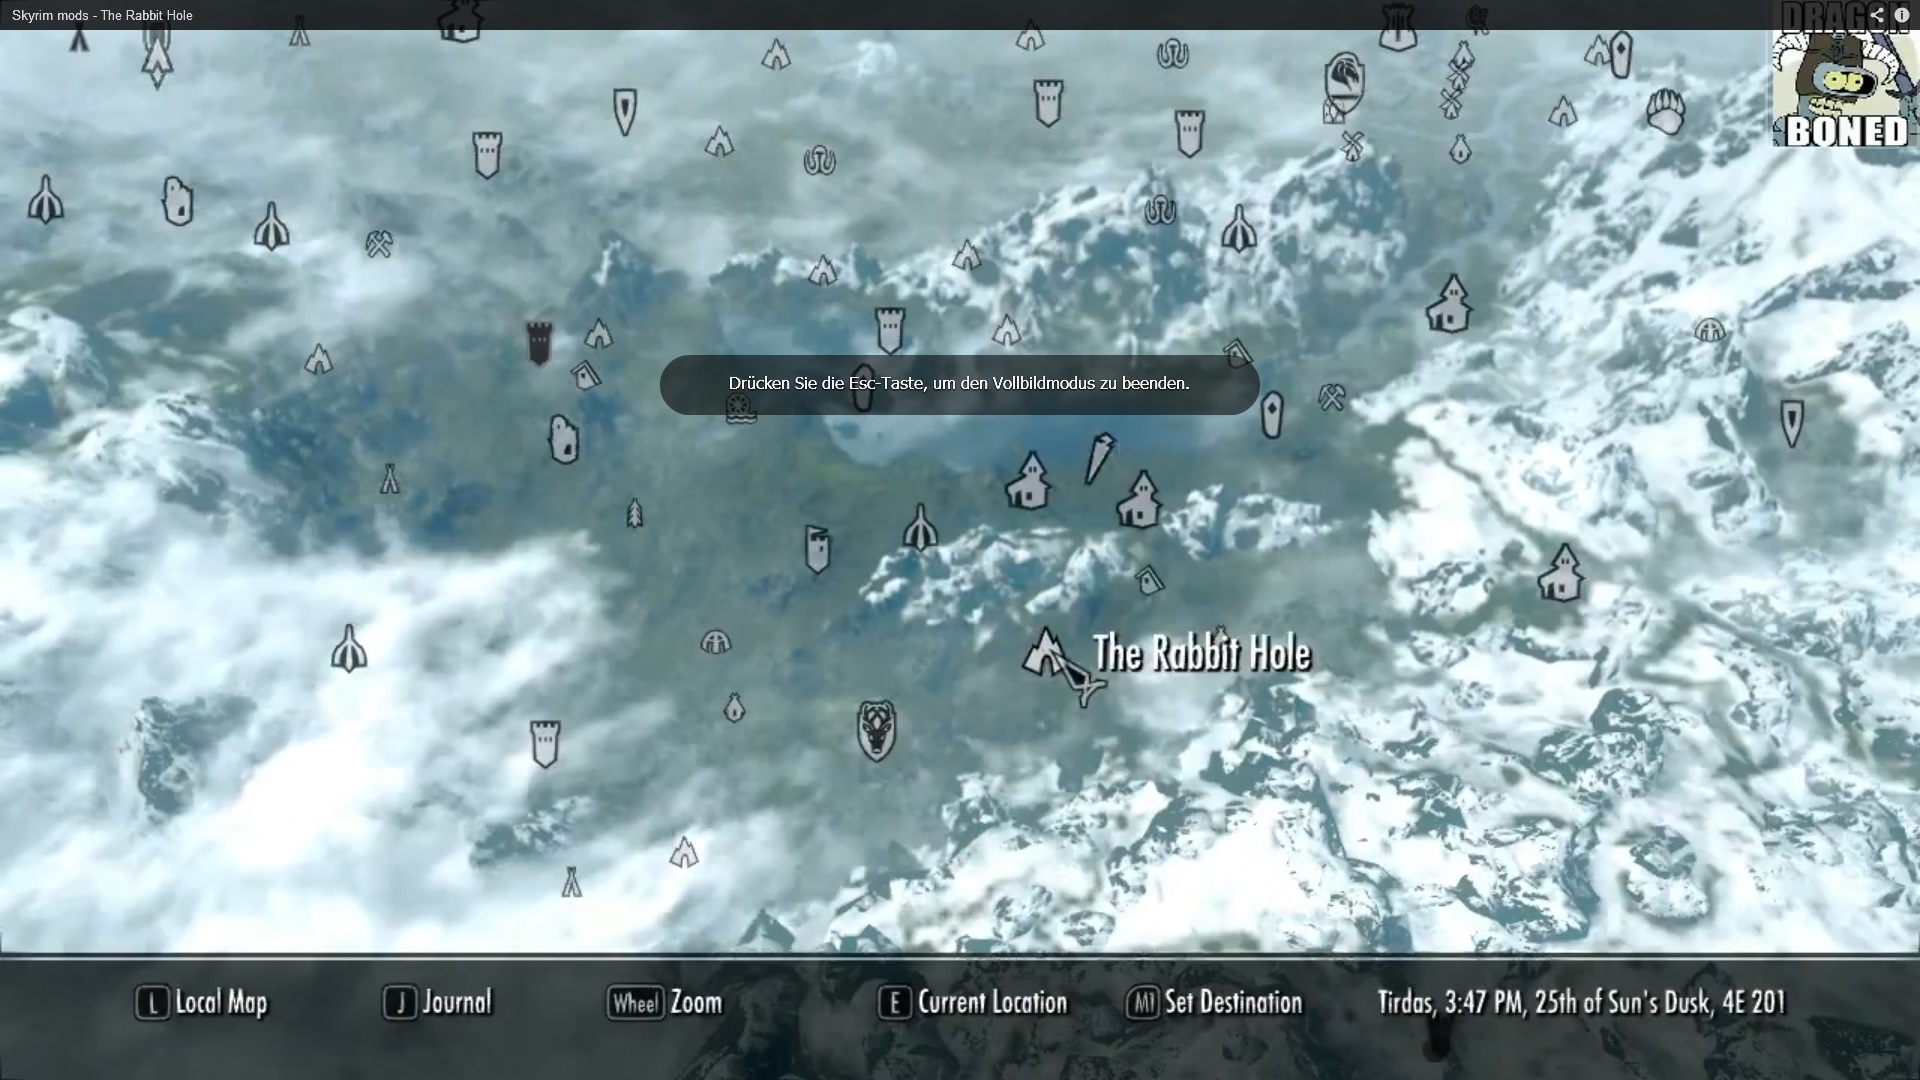
| | The entrance to the Rabbit Hole Dungeon can be found just north-east of Falkreath. |
| *Enemies to Kill: 5 Bandits
| |
| ====Stage 4==== | |
| *Enemies to Kill:
| |
| **4 Dwarven Spiders
| |
| **1 Dwarven Sphere
| |
| NOTE: If your character is a master of sneak, these enemies may not ambush you. Try shouting at the pipes to get them to pop out.
| |
|
| |
|
| ====Stage 5====
| | [[Image: TRHLocation.jpg|thumb|none|The Rabbit Hole Dungeon on the Skyrim Map]] |
| * Enemies to Kill: 3 ice wraiths
| |
|
| |
|
| ===Level 2===
| |
| * Encounter Zone:
| |
| ** Min Level: 15
| |
| Summary: This level is filled with fire-based enemies. The fire shield offered in the previous safe room has a double edge: It offers resistance to fire, but weakness to frost
| |
| ====Stage 1====
| |
| * 3 fire atronachs
| |
| ====Stage 2====
| |
| * 3 forsworn fire mages
| |
| * 2 Hagravens
| |
| * 1 Hagraven Companion
| |
| * If you are lvl 30 or greater:
| |
| ** 2 Hagravens
| |
| ** 1 Forsworn Boss
| |
| NOTE: This stage contains the hallway that leads to the secret room. This is the fabled room that requires 10 secret keys to open. Before you can get to the secret doors, you must open the portcullis. It only opens when you flip the dwemer switch in Stage 4 of this level
| |
| ====Stage 3====
| |
| * 6 Warlocks
| |
| ====Stage 4====
| |
| * 3 Dwarven Spiders
| |
| * 1 Dwarven Sphere
| |
| * 1 Dwarven Centurion
| |
| ====Stage 5====
| |
| * 1 Wisp Mother
| |
| ** If you are above level 30, there will be 3 wisp mothers
| |
| * The second time you play this stage there will instead be:
| |
| ** 3 Frost Atronachs
| |
|
| |
|
| ===Level 3===
| | <tabber> |
| * Encounter Zone
| | "Level 1"= |
| ** Min Lvl 20
| | {{SubA|Level 1|Level 1}} |
| Summary: This level is filled with undead enemies. Fire and silver weapons are effective. The safe room preceding this one has holy weapons, these have a chance of making your enemies flee
| | |-| |
| ====Stage 1====
| | "Level 2"= |
| * 4 Werewolves
| | {{SubA|Level 2|Level 2}} |
| NOTE: The follower [http://tvtropes.org/pmwiki/pmwiki.php/Main/TheChick The Chick] appears in this stage, but only during your second playthrough
| | |-| |
| | | "Level 3"= |
| ====Stage 2====
| | {{SubA|Level 3|Level 3}} |
| * 19 Draugr
| | |-| |
| ====Stage 3====
| | "Level 4"= |
| * 4 Necromancers
| | {{SubA|Level 4|Level 4}} |
| ** These Necro's will try to summon some of the corpses lying around the place
| | |-| |
| * There will be 3 High-level necro's if you are above level 40
| | "Level 5"= |
| ====Stage 4====
| | {{SubA|Level 5|Level 5}} |
| * 4 Ghosts
| | |-| |
| NOTE: This stage features the 'warp zone'. Jump into the Dwarven Lift before killing all the enemies in this room, and you will find yourself in a room with 3 doors, these will take you to levels 6,7, and 8.
| | "Level 6"= |
| ====Stage 5====
| | {{SubA|Level 6|Level 6}} |
| * 5 Vampires
| | |-| |
| NOTE: The Dwarven lever in this room will summon a fire warlock, use it to help you against the vampires if they are giving you trouble.
| | "Level 7"= |
| | | {{SubA|Level 7|Level 7}} |
| ===Level 4===
| | |-| |
| * Encounter Zone
| | "Level 8"= |
| ** Min Level: 25
| | {{SubA|Level 8|Level 8}} |
| Summary:
| | |-| |
| # This level is not linear like the others. You start off in the safe room, and can tackle the 5 stages in any order you wish.
| | "Level 9"= |
| # Each stage gives you a single key.
| | {{SubA|Level 9|Level 9}} |
| # Only with all 5 keys can you unlock the doors to Level 5
| | |-| |
| # In the lower floor of the safe room you will find the follower 'The Lancer'
| | "Level 10"= |
| ====Stage 1====
| | {{SubA|Level 10|Level 10}} |
| * 2 Spriggans
| | |-| |
| * 4 Spriggan Companions
| | </tabber> |
| NOTES:
| |
| # On your way back, the Sword of Plot Advancement will appear. This does +40 damage against dragons.
| |
| # To go back to the safe room, stand on the wooden stump and jump. Followers may have disappear when you go back, in this case save your game and reload.
| |
| | |
| ====Stage 2====
| |
| # Go to the altar and pick up the Rabbit Hole Glass Claw
| |
| # Kill the 3 Draugr that wake up
| |
| # On your way out, kill the two Necromancers that appear
| |
| ====Stage 3====
| |
| # This is a wing of the safe room. Kill the 3 bandits at the top of the tower
| |
| # Take the key from the chest that appears
| |
| # On your way back to the safe room you will have to kill 6 Bandits
| |
| ====Stage 4====
| |
| * 3 spheres
| |
| * 2 Dwarven Centurions
| |
| ====Stage 5====
| |
| # Kill the 3 frost trolls
| |
| # Kill the 3 Ice Wraiths
| |
| # Grab the key from the chest
| |
| # Kill the Wisp mother on you way out
| |
| | |
| ===Level 5===
| |
| * Encounter Zone:
| |
| ** Min Level: 30
| |
| ====Stage 1====
| |
| * 2 Giants
| |
| * 1 Mammoth
| |
| ====Stage 2====
| |
| * 4 Spiders
| |
| * 1 Hagraven
| |
| * 2 Forsworn
| |
| ====Stage 3====
| |
| * 5 Atronachs
| |
| NOTE: After finishing this stage, go backwards, you will encounter the Giant Switch, this unlocks switches all over the dungeon
| |
| ====Stage 4====
| |
| * 3 Falmer Bosses
| |
| * 2 Falmer Companions
| |
| ====Stage 5====
| |
| * 1 Frost Dragon Priest
| |
| * 1 Ghost Dragon with Frost Spells
| |
| | |
| ===Level 6===
| |
| ====Stage 1====
| |
| ====Stage 2====
| |
| ====Stage 3====
| |
| ====Stage 4====
| |
| ====Stage 5====
| |
| ===Level 7===
| |
| ====Stage 1====
| |
| ====Stage 2====
| |
| ====Stage 3====
| |
| ====Stage 4====
| |
| ====Stage 5====
| |
| ===Level 8===
| |
| ====Stage 1====
| |
| ====Stage 2====
| |
| ====Stage 3====
| |
| ====Stage 4====
| |
| ====Stage 5====
| |
| ===Level 9===
| |
| ====Stage 1====
| |
| ====Stage 2====
| |
| ====Stage 3====
| |
| ====Stage 4====
| |
| ====Stage 5====
| |
| ===Level 10===
| |
| ====Stage 1====
| |
| ====Stage 2====
| |
| ====Stage 3====
| |
| ====Stage 4====
| |
| ====Stage 5====
| |


